Real programming with JavaScript - I/O - Some input and output options
We can’t go on like this. Using prompt() and alert() for all input and output (as we did in the previous articles is unwieldy and just plain dumb when there are many ways of skinning this particular cat. So this month we’ll make a diversion into some I/O options that are available to JavaScript.
write() it as you go
Our first option is to insert text (as HTML) into our page as it is written using the
window.document.write()
function. This will take whatever values are passed inside the brackets and write them into the document that is currently open in the browser window. Listing 1 shows this in use, replacing the alert() function used in an example from last month.
Listing 1
primeMinister = new Array();

primeMinister["barton"] = ["Sir Edmund BARTON","1901-03"];
primeMinister["bruce"] = ["Stanley Melbourne BRUCE","1923-29"];
primeMinister["chifley"] = ["Joseph Benedict CHIFLEY","1945-49"];
primeMinister["cook"] = ["Joseph COOK","1913-14"];
primeMinister["curtin"] = ["John Joseph CURTIN","1941-45"];
primeMinister["deakin"] = ["Alfred DEAKIN","1903-04","1905-08","1909-10"];
primeMinister["fadden"] = ["Arthur William FADDEN","1941-41"];
primeMinister["fisher"] = ["Andrew FISHER","1908-09","1910-13","1914-15"];
primeMinister["forde"] = ["Francis Michael FORDE","1945-45"];
primeMinister["fraser"] = ["John Malcolm FRASER","1975-83"];
primeMinister["gorton"] = ["John Grey GORTON","1968-71"];
primeMinister["hawke"] = ["Robert James Lee HAWKE","1983-91"];
primeMinister["holt"] = ["Harold Edward HOLT","1966-67"];
primeMinister["howard"] = ["John Winston HOWARD","1996-"];
primeMinister["hughes"] = ["William Morris HUGHES","1915-23"];
primeMinister["keating"] = ["Paul John KEATING","1991-96"];
primeMinister["lyons"] = ["Joseph Aloysius LYONS","1932-39"];
primeMinister["mcewen"] = ["John McEWEN","1967-68"];
primeMinister["mcmahon"] = ["William McMAHON","1971-72"];
primeMinister["menzies"] = ["Robert Gordon MENZIES","1939-41","1949-66"];
primeMinister["page"] = ["Earle Christmas Grafton PAGE","1939-39"];
primeMinister["reid"] = ["George Houstoun REID","1904-05"];
primeMinister["scullin"] = ["James Henry SCULLIN","1929-32"];
primeMinister["watson"] = ["John Christian WATSON","1904-04"];
primeMinister["whitlam"] = ["Edward Gough WHITLAM","1972-75"];

var selectedPM = prompt( "Which PM?","" );

var outputPM = primeMinister[ selectedPM.toLowerCase() ];

window.document.write( "<p>", outputPM.join("<br />"), "</p>" );
window.document.close();
(Live example currently deactivated)
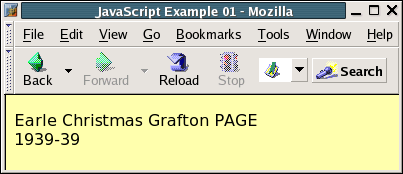
This example still uses the prompt() function for input (we’ll fix that in a minute), but output now appears on the body of the HTML page not in an alert box. Notice that we can pass more than one value to window.document.write(). In this case we have passed the HTML tag <p> (for paragraph), then the details of the selected prime minister separated by line break tags <br />, and finally the tag to end the paragraph </p>. A possible result is shown in figure 1.
Figure 1. Wow - what a mouthful!
This output method adds stuff to the page as it is loading, but it can’t change the content of the page once it has finished loading. There is a way to alter a HTML document after it has loaded - we’ll get to that shortly.
<form> it up
A second option is to use HTML forms. Forms are normally used to pass information back to the web server but JavaScript can also interact with HTML forms. To illustrate this we’ll need to look at the entire HTML file, not just the JavaScript part - see listing 2.
Listing 2
<html>
<head>
<title>JavaScript Example 02</title>
<script language="JavaScript">
<!--
primeMinister = new Array();
primeMinister["barton"] = ["Sir Edmund BARTON","1901-03"];
... as in listing 1 ...
primeMinister["whitlam"] = ["Edward Gough WHITLAM","1972-75"];
function getInput()
{
var selectedPM = window.document.ioForm.inputField.value
selectedPM = primeMinister[ selectedPM.toLowerCase() ];
window.document.ioForm.outputArea.value = selectedPM.join("\n");
}
//-->
</script>
</head>
<body>
<form name="ioForm">
<label>Which PM?</label>
<input type="text" name="inputField" />
<input type="button" name="actionButton" value="OK" onClick="getInput();" />
<br />
<textarea cols="32" rows="4" name="outputArea"></textarea>
</form>
</body>
</html>
(Live example currently deactivated)
In explaining this example, we’ll start in the second part between the <body> and </body> tags - this is the part of a HTML file that is “rendered” in the window a your web browser.
The first line of the body section is:
<form name=”ioForm”>
an opening tag for a form. Six lines later you can see its closing tag:
</form>
Everything between these two tags is inside the form. We’ve given this form the name ioForm, which we’ll use later.
The first element in the form is a label:
<label>Which PM?</label>
This serves a similar purpose to the message we’ve used previously in a prompt() box. Note that both the opening and closing tags are shown here on the same line.
Next we get to some input fields:
<input type=”text” name=”inputField” /> <input type=”button” name=”actionButton” value=”OK” onClick=”getInput();” />
We use two of several possible types of input field. The first is a text input field with the name inputField and the second is a button with the name actionButton. The button has a few other bits of information - its value (”OK”) appears on the face of the button. The last attribute of the button, onClick, tells the button what to do when someone clicks on the button. In this case onClick refers to a JavaScript function called getInput(). Note that <input> tags do not have a corresponding </input> closing tag.
The next line contains a line break instruction <br />, then we get to a multi-line text area:
<textarea cols=”32″ rows=”4″ name=”outputArea”></textarea>
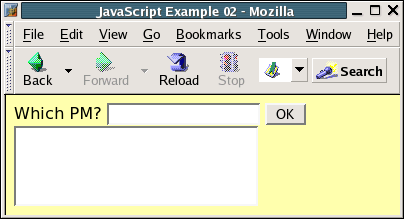
The text area is 32 columns wide, 4 rows high, and has been named outputArea. Initially there is nothing between the <textarea> and </textarea> tags, so the text area is shown empty.
All together this appears in the browser window more-or-less like figure 2.
Figure 2. One HTML form ready for use
Now to return to the <head>…</head> section. This is where we put stuff that doesn’t need to appear in the browser window. The first of these is
<title>JavaScript Example 02</title>
which simply puts an informative message into the title bar of the browser.
Next we come to the <script>…</script> area that contains the actual JavaScript code. Here we have the familiar lines that define the primeMinister associative array. Then we define the function getInput(). The first line of the function
var selectedPM = window.document.ioForm.inputField.value
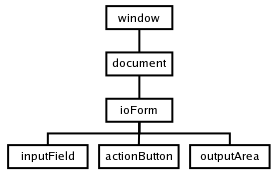
reads the value of the field called inputField, which is in a form called ioForm. In turn ioForm is found in the body of the document that is currently loaded in the browser window. This hierarchical arrangement is represented in figure 3. The value is stored in a new variable called selectedPM.
Figure 3. A hierarchy of elements
In principle the next line should be familiar:
selectedPM = primeMinister[ selectedPM.toLowerCase() ];
The value taken from the input form is used as a key in the primeMinister array, and the resulting value is stored back in selectedPM.
The next line also exploits the hierarchy shown in figure 3 to write text into the value of the text area called outputArea, which is in ioForm, which is in the HTML document, which is in the browser window:
window.document.ioForm.outputArea.value = selectedPM.join(”\n”);
Remember that selectedPM holds an array of details about the selected prime minister. So the use of the join(”\n”) function connects each element in the array using the new line character.
So how does it all work?
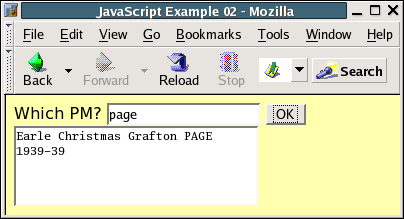
When the user clicks the button labelled “OK”, the getInput() function is called. That function reads the text in the input field, uses it as a key in the primeMinister associative array, and the details of the selected prime minister are printed into the outputArea field:
Figure 4. Input and output via HTML form
Get DOM to give you a hand
In the previous examples, the structure of the HTML page is not changed after it is loaded. In the case of the document.write() function extra stuff is added to the page as it is loaded, that is while it is being built. And manipulating data in forms does not touch the structure of the page either. But the latest browsers have a standardised “Document Object Model” (aka DOM 2). The DOM gives you the option of altering the actual HTML that makes up a HTML page. Let’s try it out - again we need to examine the entire HTML file (listing 3).
Listing 3
<html>
<head>
<title>JavaScript Example 03</title>
<script language="JavaScript">
<!--
primeMinister = new Array();
primeMinister["barton"] = ["Sir Edmund BARTON","1901-03"];
... as in listing 1 ...
primeMinister["whitlam"] = ["Edward Gough WHITLAM","1972-75"];
function getInput()
{
var selectedPM = document.ioForm.inputField.value;
selectedPM = primeMinister[ selectedPM.toLowerCase() ];
var outputPM = document.createTextNode( selectedPM.join("\n") );
var preTag = document.getElementById( "output" );
preTag.appendChild( outputPM );
}
//-->
</script>
</head>
<body>
<form name="ioForm">
<label>Which PM?</label>
<input type="text" name="inputField" />
<input type="button" name="actionButton" value="OK" onClick="getInput();" /><br />
</form>
<pre id="output"></pre>
</body>
</html>
(Live example currently deactivated)
As in the previous example, let’s start with the <body> section first. The ioForm form is almost the same as in listing 2, except we have omitted textarea outputArea. Outside the form we have also included this tag:
<pre></pre>
Web browsers normally compress white space (spaces, tab, line feeds, etc) down to a single space. However when text is placed inside a matching set of <pre>…</pre> tags, all white space is respected and reproduced in the browser. At the moment there is nothing contained within these tags but that will change. We have given this tag the id output, which is a clue as to what it’s for! (Note that the id attribute is similar but not identical to the name attribute for fields in the form.)
Let’s go back to the <script>…</script> section. After setting up our primeMinister associative array, we make a new version of the getInput() function. The selectedPM variable is populated in the same way as in listing 2. Then we get to
var outputPM = document.createTextNode( selectedPM.join(”\n”) );
Working from right to left, the details of the selected prime minister are joined by line feed characters. This text is then formatted as a “text node”, that is text that can be inserted directly into the HTML document. At this point the text node doesn’t have a position in the document, but we assign it to the variable outputPM so that we don’t lose track of it.
Next we get the program to find the element with the id=”output” attribute - and we know that this will be our <pre> tag:
var preTag = document.getElementById( "output" );
The getElementById() function is kind of like a big finger - the program runs its virtual finger through the HTML document until it finds the appropriate tag then holds its “finger” there as a marker, just like you might with a telephone book or street directory. Because the position of this pointing finger amounts to a value, we can save it in the variable preTag.
The next line takes our new text node (held in outputPM) and shoves it into the HTML document at the spot marked by preTag:
preTag.appendChild( outputPM );
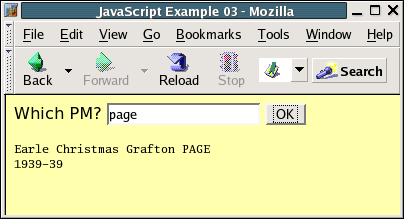
We have now altered the text of a HTML page dynamically:
Figure 5. Prime Minister Page - his details inserted into this page.
Explaining a hack
A final note about using <pre> tags for output, because this was a bit of a hack to simplify things. The document.createTextNode() function treats every value that is passed to it as plain text, which means it does not understand or respect HTML tags. So where in listing 1 we could use the line:
window.document.write( “<p>”, outputPM.join(”<br />”), “</p>” );
this equivalent idea does not work:
document.createTextNode( selectedPM.join(”<br />”) );
So use of the <pre> tag and joining the elements of selectedPM with the \n character allowed the columnar appearance to be retained. It is possible to produce more elegant HTML using the DOM but it’s beyond the scope of this article. We will return to the DOM in later articles but readers who have an immediate interest in fiddling with the DOM are well advised to look up the excellent tutorial “Dynamic Content with DOM-2″ at http://developer.apple.comternet/webcontent/dom2i.html.
Wrap up
This article covered three different ways of doing output and one extra method of input in JavaScript:
- The document.write() function allows extra HTML to be added as a page is being loaded into the browser.
- JavaScript can interact with HTML forms to provide both output and input.
- The structure of a HTML page can be fundamentally altered by manipulating the Document Object Model.
tech.thingoid Gosbell First published: PC Update September 2004